
Odoo 19 empowers developers with advanced tools for custom modules and AI integrations. This guide focuses on a source-based installation on Ubuntu 22.04 LTS for development, integrated with PyCharm for efficient coding, debugging, and testing. Ideal for building and iterating on Odoo apps—expect a 45-60 minute setup.
Prerequisites
- OS: Ubuntu 22.04 LTS.
- Hardware: 4GB+ RAM, 2+ vCPUs, 20GB+ disk.
- Sudo Access: Required for installations.
- PyCharm: Download Community Edition from JetBrains.
- Update system:
sudo apt update && sudo apt upgrade -y
Installing Postgresql
Odoo uses PostgreSQL for databases.
- Install:
>> sudo apt install postgresql -y
2. Start and enable:
>> sudo systemctl start postgresql

>> sudo systemctl enable postgresql
3. Create "odoo" postgres user:
>> sudo -u postgres createuser --createdb --username postgres --no-createrole --no-superuser --pwprompt odoo
4. Create a Strong password When prompted I have created
securePassword@123

Install Python and Dependencies
Odoo 19 needs Python 3.10+ preferably 3.12 atleast.
- Install Python and Dependencies:
>> sudo apt install python3-pip python3-dev python3-venv libxml2-dev libxslt1-dev libldap2-dev libsasl2-dev libtiff5-dev libjpeg8-dev libopenjp2-7-dev zlib1g-dev libpq-dev liblcms2-dev libblas-dev libatlas-base-dev -y

>> pip install --upgrade pip virtualenv
Install wkhtmltopdf
Odoo 19 needs wkhtmltopdf 0.12.6 to print PDF reports.
- Install Python and Dependencies:
>> sudo apt-get update && sudo apt-get install wkhtmltopdf -y
2. Verify the installation
>> wkhtmltopdf --version
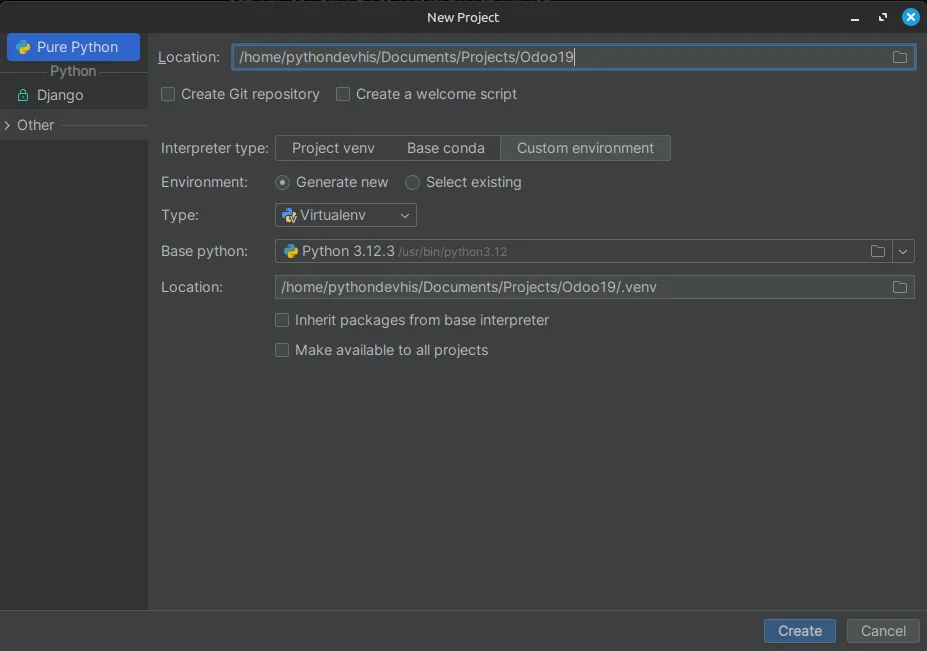
Creating Project and Cloning odoo
Setting up Odoo as a project in Pycharm
- Create a New Project in Pycharm,
- Make sure to select "Generate new" for creating a venv (virtual Environment)
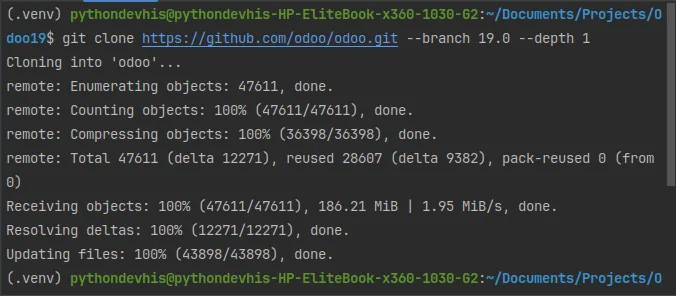
2. After Successful Creation Open Terminal and clone odoo in the Odoo19 Directory
>> git clone https://github.com/odoo/odoo.git --branch 19.0 --depth 1
--branch 19.0 option selects the branch 19.0 you can choose other version of Odoo as well example 16.0, 17.0 or 18.0
--depth 1 option creates a shallow clone of a repository, specifically limiting the history to only the most recent commit on the specified branch (or the default
branch if none is specified).
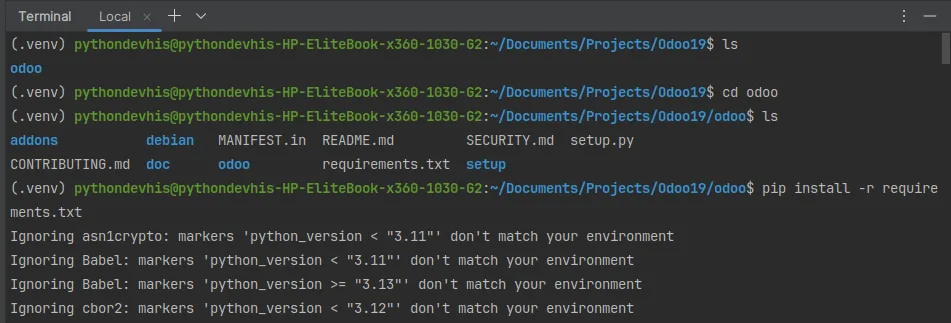
3. Activate venv --> Go inside the odoo directory --> Install requirements
>> source .venv/bin/activate
>> cd odoo
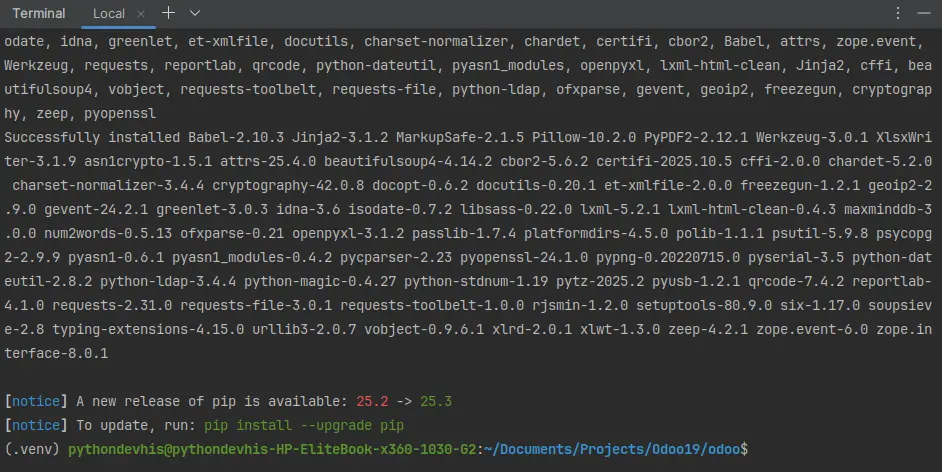
>> pip install -r requirements.txt
Creating Odoo configuration
- Create conf directory with odoo.conf file inside it

2. Copy the following contents to odoo.conf
[options]
; This is the password that allows database operations:
admin_passwd = admin
db_host = localhost
db_port = 5432
db_user = odoo
db_password = securePassword@123
addons_path=/home/pythondevhis/Documents/Projects/Odoo19/odoo/addons,/home/pythondevhis/Documents/Projects/Odoo19/custom_addons
default_productivity_apps = True
admin_passwd -- Create a secure password here as it will be required for db operations within odoo
db_host -- Generally localhost if your db is located somewhere else add that host here
db_port -- Default port for postgres is 5432 but if you have changed it then add that port here
db_user -- odoo in our case we created earlier you can create another
db_password -- password of the user mentioned in db_user
addons_path -- Here you need to add absolute path of addons folder present inside the odoo first, then you can add other paths as comma seperated list as shown in above example
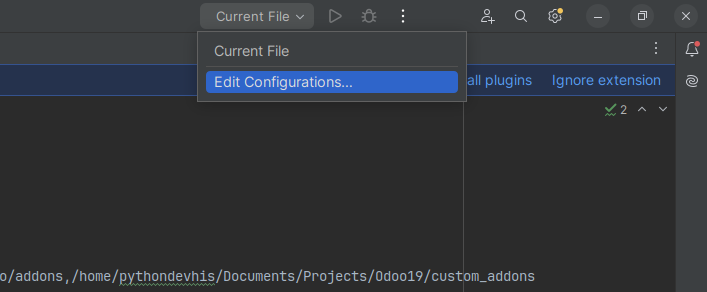
Configuring Pycharm to run Odoo
- Click on Edit Configurations
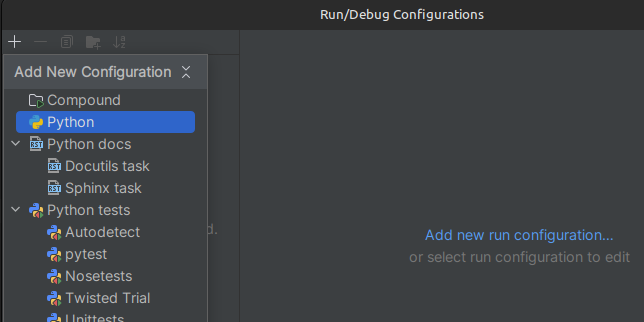
2. Click on + Icon in Run/Debug Configuration Dialog box and select Python
3. Add configuration as shown below
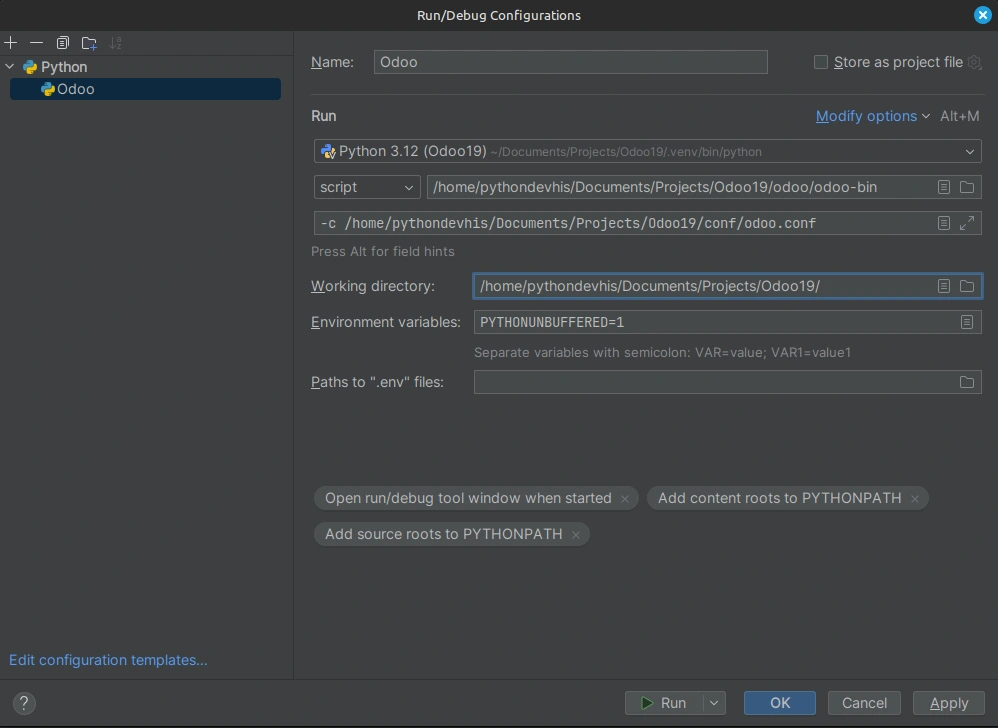
Name: Name of the configuration
script: Give Absolute path of the odoo-bin
script parameters: -c <absolute path to your odoo.conf>
working directory: <absolute path to your Project Directory in our case Odoo19>
Test Run
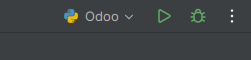
- Run Odoo Using the Run Button

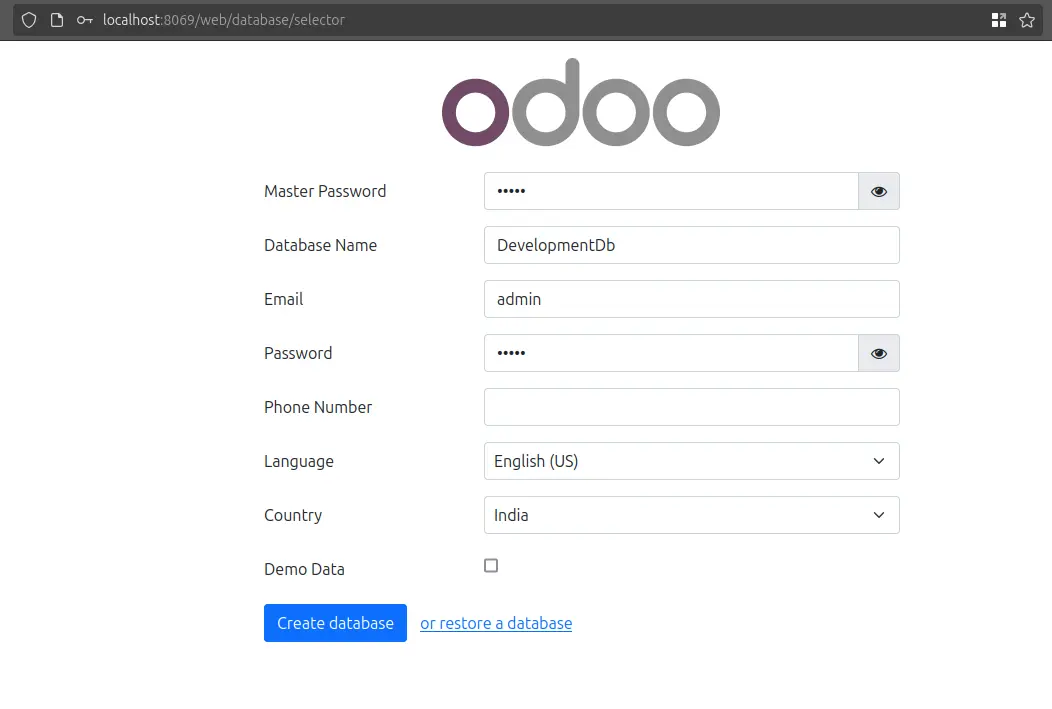
2. Create your first Test db
- Enter master password
- Database name
- email and password for login
- Demo Data - You can check this box to enable demo records to be present for development
- Then click on Demo data
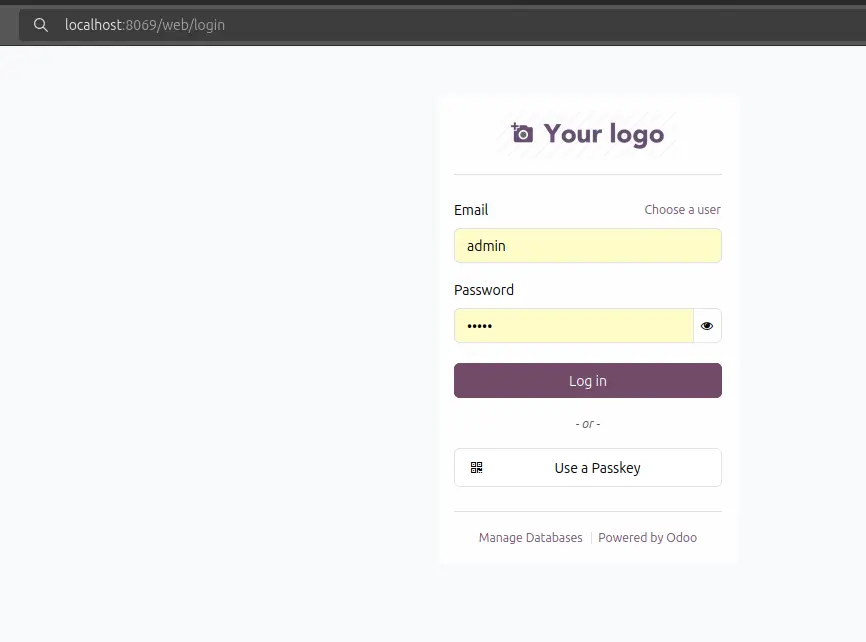
3. Now You can login to your db
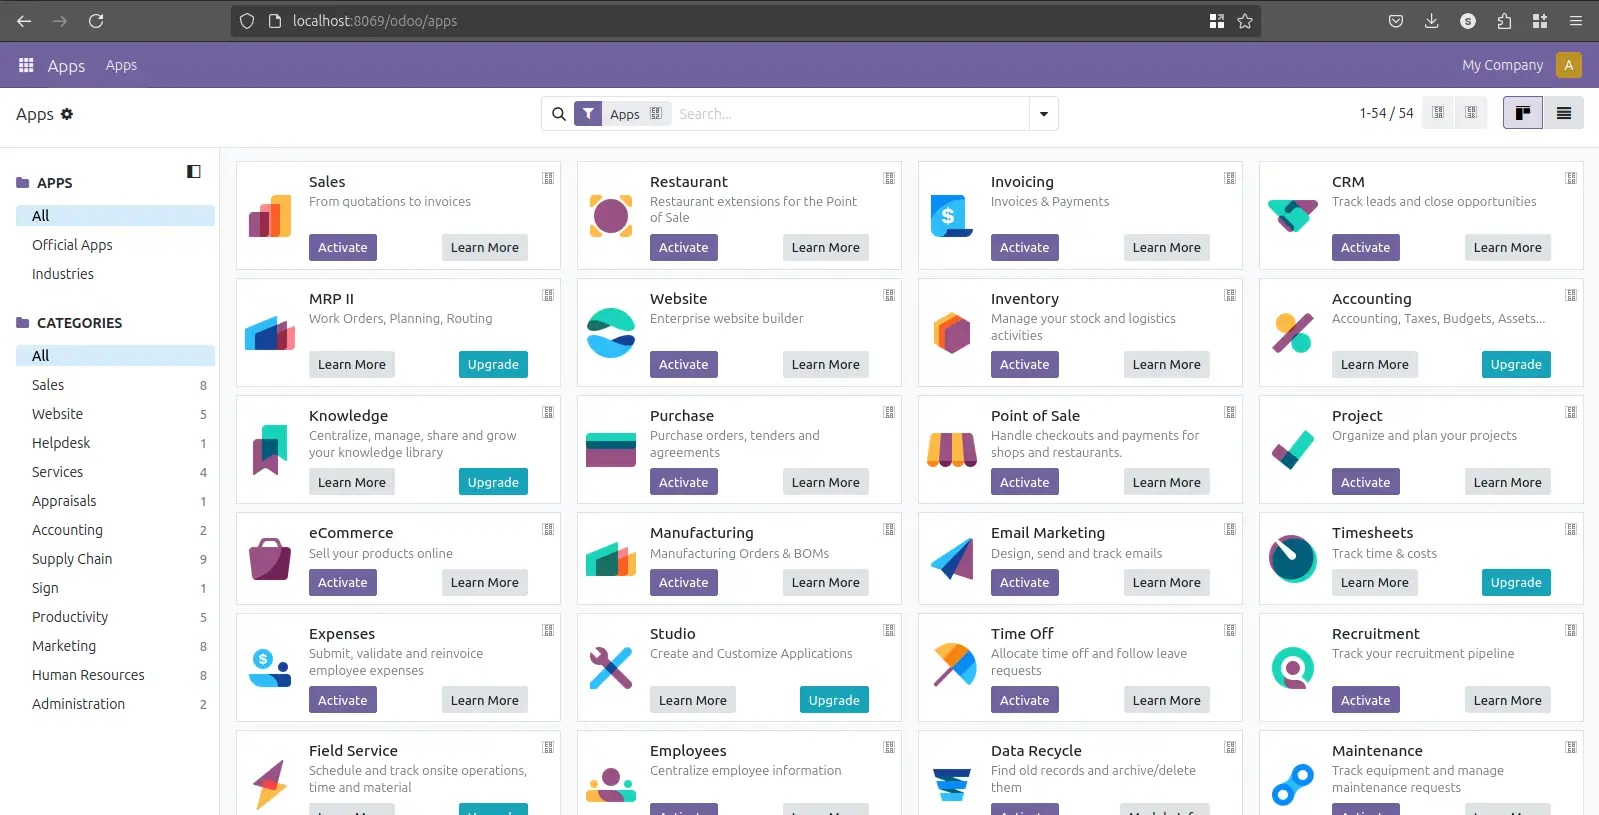
4. Voila! Odoo is installed, Happy Development ;)
Development Tips
-i: Install some modules before running the server (comma-separated list). This is equivalent to going to Apps in the user interface, and installing the module from there.
-u: Update some modules before running the server (comma-separated list). This is equivalent to going to Apps in the user interface, selecting a module, and upgrading it from there.
- For enterprise: Clone odoo/enterprise and add to addons_path.
Your Odoo 19 dev setup is ready—dive into custom modules! Questions? Comment below.
Explore more at straitcoders.com